Problem Overview
Undetected water loss is a silent threat that leads to structural damage and inflated utility expenses. Many homeowners remain unaware of a problem until a damp spot appears on the ceiling or a massive bill arrives in the mail. Learning how to check your home for water leaks and finding these issues early prevents wood rot, hazardous mold growth, and the deterioration of flooring.
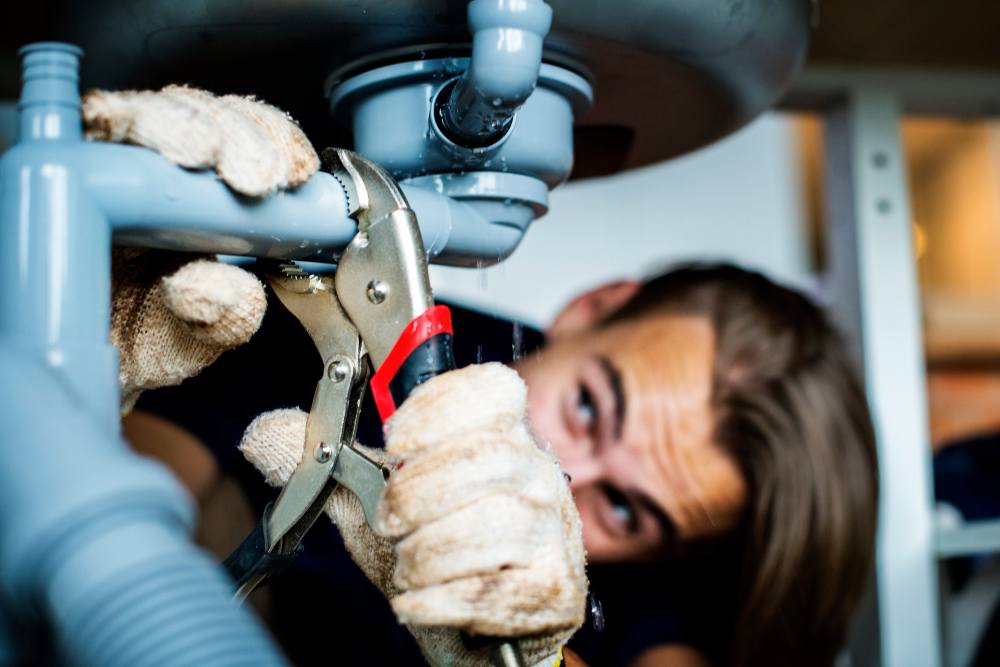
Tools Needed
- A gallon-sized bucket
- Standard screwdriver
- Flashlight with fresh batteries
- Paper towels
- Adjustable wrench
- Dye tablets or food coloring
Step-by-Step Instructions
Step 1: Locate your main water meter, which is typically found in a concrete box near the street or in a basement. Ensure all faucets, appliances, and irrigation systems are completely off. Watch the small leak indicator dial or the digital readout for at least five minutes. If the numbers change or the triangular dial spins while no water is in use, you have a leak somewhere in your lines.
Step 2: Conduct a visual inspection of every sink in the house. Open the cabinets underneath and use a flashlight to check the P-traps and supply lines. Run a dry paper towel along the pipes; even a tiny amount of moisture will show up clearly on the paper, indicating a loose connection or a pinhole leak that might otherwise go unnoticed.
Step 3: Check your water heater for signs of corrosion or pooling. Examine the Temperature and Pressure (T&P) relief valve and the discharge pipe. If you see water dripping from the overflow pipe or a puddle forming at the base of the tank, the internal lining or a specific valve likely needs immediate attention.
Step 4: Test the toilets for silent leaks using the dye method. Remove the tank lid and add several drops of coloring. Do not flush the toilet for thirty minutes. If the color seeps into the bowl, the flapper is failing to create a watertight seal, allowing a constant flow of water down the drain.
Step 5: Inspect outdoor hose bibs and irrigation heads. Turn on the exterior faucets and look for water spraying from the handle or the base of the fixture. In the yard, look for patches of grass that are significantly greener or softer than the surrounding area, as this often points to a ruptured underground lateral line.
Step 6: Examine the walls and ceilings for discoloration or bubbling paint. Check the perimeter of your dishwasher and refrigerator, especially if you have an automatic ice maker. Pull these appliances away from the wall periodically to verify that the flexible plastic or copper supply lines remain intact and dry.
Safety Warnings
Always turn off the electricity or gas supply before inspecting areas near water heaters or appliances to avoid shocks or combustion risks. If you discover a leak near electrical outlets or your main breaker panel, do not touch the water or the fixtures; instead, shut off the main water valve immediately.
When to Call a Professional
While many surface-level drips are manageable for a handy homeowner, deep-seated issues require specialized diagnostic tools. If your meter indicates water movement but you cannot find a visible source, the leak is likely beneath your concrete slab or deep within the walls. Professional leak detection uses acoustic sensors and thermal imaging to find the exact point of failure without tearing up your flooring.
Request a Professional Leak Detection Service
Our team provides comprehensive inspections and durable repairs for any plumbing concern. Reach out to us to book an appointment and secure your home against water damage.